How to Choose the Right Interior Tire?
Choosing the right Interior Tire starts with matching it to the wheel and the way the vehicle is used. The name can mean different things across product listings, so confirm whether you need an inner tube or another tire component before ordering. A small misunderstanding here can leave you with a part that looks right but does not fit.
Check the tire’s sidewall for its size, then compare that information with the product specifications and your vehicle manual. A tube, where applicable, must be designed for the tire’s size and construction. Look closely at the valve type and position, too. It should pass cleanly through the rim opening without bending or rubbing. These details are easy to miss on a phone screen. They matter.
Use also shapes the choice. A bicycle used on smooth pavement may need different features from one ridden on rough paths; vehicle tires likewise depend on load, speed, and operating conditions. Follow the manufacturer’s recommendations rather than relying on appearance or price alone. Inspect the rim and existing tire for sharp edges, cracks, or uneven wear before fitting any replacement. If the size marking is unclear, ask a qualified tire professional to verify it. That extra check may feel fussy, and it will not prevent every problem. Still, choosing an Interior Tire by fit, specification, and intended use is more dependable than guessing.
Determine Whether Your Tire Uses an Inner Tube or a Tubeless System
A tube is a separate rubber chamber fitted inside the tire. A tubeless tire holds air directly between the tire and a sealed wheel rim. The difference affects repairs and replacement choices, so check before buying. Look closely.
Read the tire’s sidewall for wording such as “TUBE TYPE” or “TUBELESS.” These markings are useful, but they do not always tell you how the wheel is currently set up. A tubeless-ready tire may still contain a tube. The valve can offer clues, too, but both systems use valves, so its appearance alone is not proof. Sometimes the evidence is messy.
Check the rim for a tubeless valve, airtight rim tape, and signs of sealant near the tire bead. A tube may be visible if you carefully remove the tire, but avoid forcing the bead with sharp tools. If you are unsure, ask a qualified bike mechanic to inspect the wheel. Mention the tire markings and wheel size; those details help prevent a mismatched replacement. Even experienced riders can overlook a tube tucked inside a tubeless-compatible tire.
How to Choose the Right Inner Tube
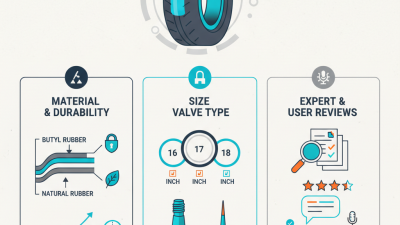
The chart shows typical system features: 1 means present and 0 means absent. Check the tire sidewall and rim specifications for markings such as “Tube Type” or “Tubeless”; a valve stem through the rim alone does not identify the system. Confirm compatibility before fitting or replacing a tube.
Decode ETRTO/ISO 5775 Sizing: 37-622 Means 37 mm Wide, 622 mm Bead Seat
How to Choose the Right Interior Tire?
A replacement inner tube must match the tire’s size, not just the wheel’s appearance. On the sidewall, 37-622 follows ETRTO sizing used in ISO 5775. The first number, 37, indicates a nominal tire width of 37 millimetres. The second, 622, is the bead seat diameter: the diameter where the tire sits on the rim. That number matters. A tube marked for a different bead seat diameter usually will not fit correctly.
Check the full marking on your tire before shopping. Inner tubes often list a compatible width range, such as 35–43 mm, along with 622. A tube covering 37-622 can work even if its printed width is not exactly 37 mm. Too narrow, and it may stretch excessively; too wide, and it can fold inside the tire. Look at the valve type and length, too. A deep rim may need a longer valve stem to reach through the rim opening.
During installation, add just enough air to give the tube its shape, then tuck it evenly into the tire. Run your fingers around both sides to check that no rubber is trapped beneath the tire bead. I still double-check the sidewall, because similar-looking wheel sizes can cause easy mistakes. The labels are small. Follow the tire and rim pressure limits when inflating, and replace a damaged tube rather than relying on a patch for every ride.
Inflate Within the Tire’s Sidewall Limits: 1 bar Equals Approximately 14.5 psi
How to Choose the Right Interior Tire?
Inflate Within the Tire’s Sidewall Limits: 1 bar Equals Approximately 14.5 psi
The pressure printed on a tire’s sidewall is a boundary, not always the best everyday setting. One bar equals about 14.5 psi, so a sidewall marking of 4 bar is roughly 58 psi. Check the units carefully; a quick conversion can prevent a costly mistake. Stay within the tire’s stated range and respect any lower pressure limit specified for your rim or inner tube.
Use a reliable pressure gauge rather than judging by thumb pressure. Inflate in small steps, then check again before riding, especially after a temperature change. Rider weight, tire width, and rough pavement all affect how the tire feels. Too little pressure can cause impacts or pinch flats; too much can make the ride harsh and reduce grip. I’ve found that a careful test ride helps, though my first setting is not always right.
Tips: Check pressure when the tire is cool. If unsure, start near the middle of the recommended range, then adjust gradually without crossing the sidewall limit.